If you do not have raptor mapped as a drive, then
click on Map network drive (on the menu bar at the
top of the window) and follow the instructions below.
There are three things you need to set up for working on CO327:
raptor to
act as a web server for you.On this module we will be using a web authoring tool called "Amaya". This is open source software designed by the World Wide Web Consortium (W3C). It is already installed on the public PCs and you can download it free of charge for use non your own machines if you wish.
To create a shortcut, click on the Start button
on the task bar at the bottom of the screen. Then click on
All Programs -> Departmental Software -> Computer Science -> Amaya
And then with the right mouse button, click on
Amaya
and click on Send to -> Desktop (create shortcut)
Check that the shortcut has been placed on the desktop.
Notepad++ is also found under the Departmental Software for
Computer Science. Create a shortcut to it on the desktop in the way
that you did for Amaya.
To be able to publish web pages across the campus network, you must use the space allocated to you on the Computer Science machine raptor, and put the pages into a particular folder.
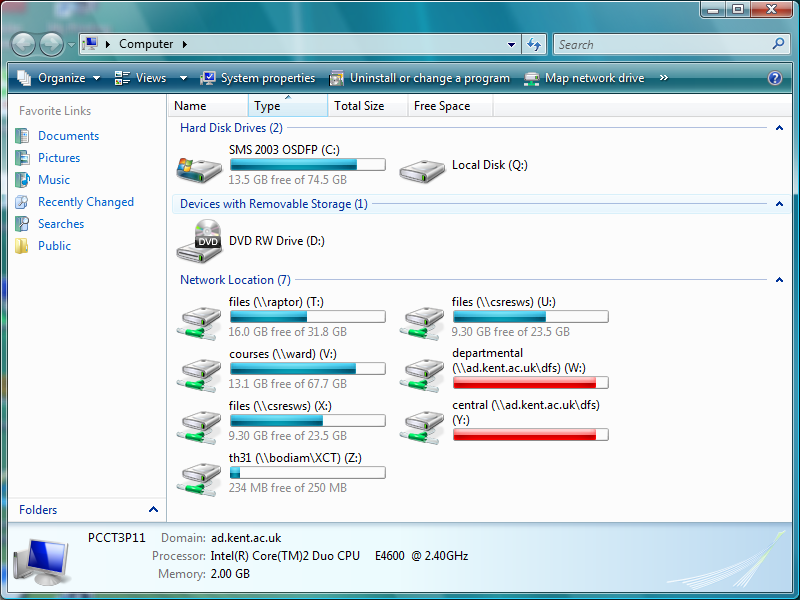
The first thing to do is to make raptor available as a networked drive, and to ensure that it is mounted every time you log in.
Click on Start and then Computer.
Check if you already have raptor mounted as a drive, as shown
below. The exact drive letter
does not matter. If you do not have the drive mapped, follow
these instructions. (If is is already mapped, move on to the section
Filename extensions.)
|
|
If you do not have raptor mapped as a drive, then
click on |
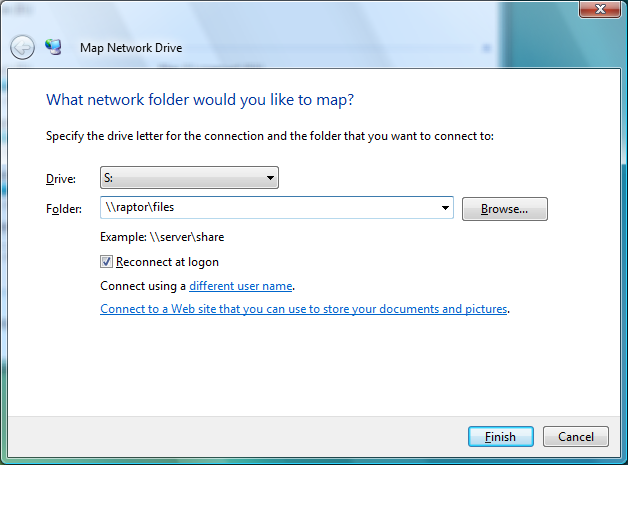
|
Let the system choose the drive letter in the Into the Folder input box, you type
Put a tick into the Then click Warning: If the system asks you for a password then it means that you do not have permission to use the machine raptor. Tell your class supervisor and we will sort it out for you. |
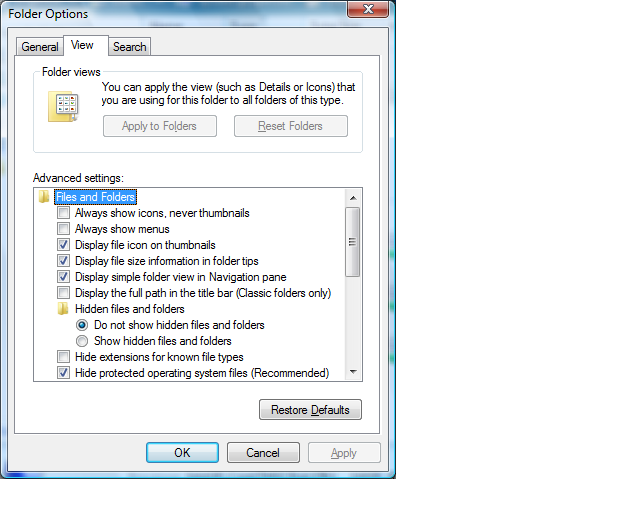
Before we continue there is a very useful setting worth making. By
default, filename extensions are not displayed, so a Word
document called, for example myReport.doc would appear
as only myReport . It would not have the extension
.doc. This can be very confusing when you are working
with files of different types. These instructions will make the system
display the filename extensions.
|
Displaying the extensions
Click on Now click on Find the check box labelled If there is a tick in the box
click it to remove the tick and then click
|
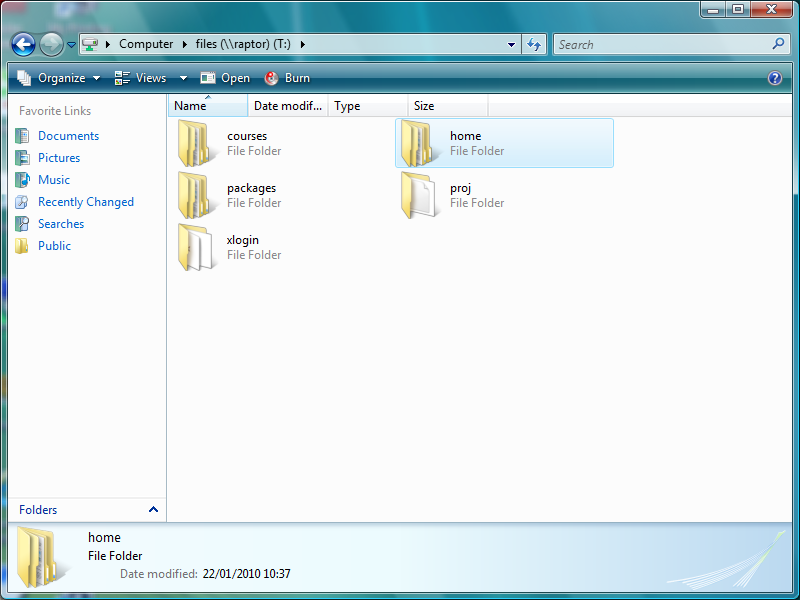
Once raptor is mapped as a drive (as shown in the diagram at the top of this page) you can double click on it and you will find that you have access to these folders:
|
Your Home folder is where you can store your own files.
|
You may use your home folder on raptor for two purposes:
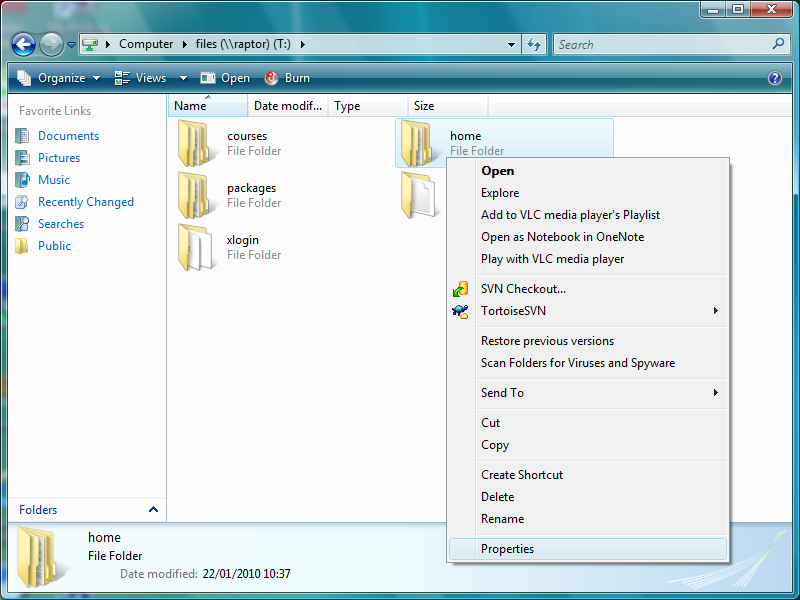
All files and folders have permissions associated with them that control who can and cannot view or change them. The instructions below will show you how to create and organise your folders so that you can work effectively and safely on this module.
|
Right click on your home folder and select
|
|
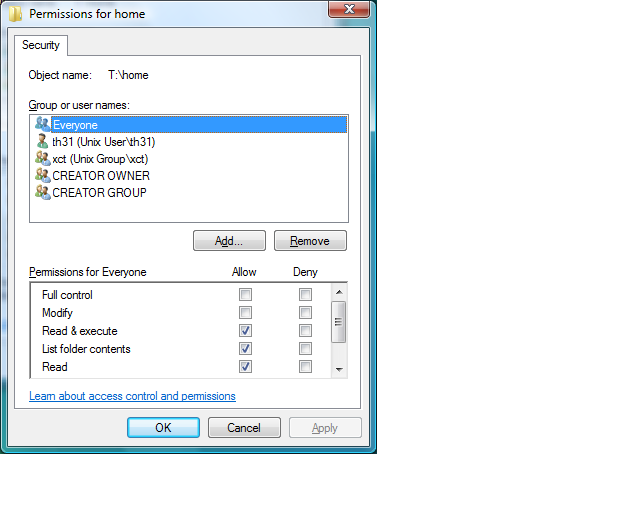
In the popup window, click on the
and then on
Select In the Permissions for Everyone window, set ticks in the three boxes as shown in the screen shot. Then click |
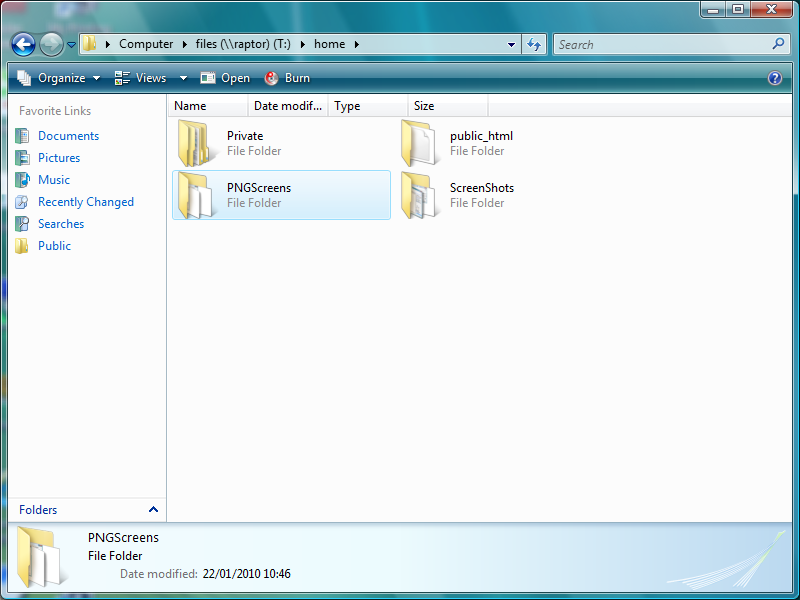 |
Open your home folder (by double clicking on its
icon).
Create a
folder called Create another folder called
Warning: make sure that you type the name of this second folder exactly as shown - in lower case and with an underscore separating the two words. |

|
To set the permissions on the Private
folder, right click on its icon and then select
Properties.
In the popup window, click on the
Security tab and then on Click on Make sure that there are no ticks in the
boxes - as shown in the diagram. This will ensure that
other people cannot read the files that
you store under the Then click Apply and OK. Then If you already have any work in your home folder you should now move it all into your Private folder. |
|
|
To set the permissions on the
public_html folder, right click on its
icon and in the popup window, click on the Security tab.
Click on Everyone. In the Permissions for Everyone window, set ticks in the boxes as shown in the diagram. Then click Apply and OK. |
What you will now do is put a test file into your public_html folder and then see if another student in the class can view it in a browser.
Computer window as shown
at the top of the page.testPage.html into your public_html
folder.Ask your neighbour in the class to start up a browser and then in the address box, carefully type
http://raptor.kent.ac.uk/~login/testPage.html
Replace login with your own login. So for user xyz the address would be
http://raptor.kent.ac.uk/~xyz/testPage.html
Your neighbour should be able to see your page containing your name. You must ask someone else to view your page - you cannot test it by looking at it yourself.
Show your class supervisor. If you can show your supervisor in week 14 or 15, then this will count towards your portfolio of class exercises, as part of assessment 1.
Then return to the page for Terminal Session 2 exercises to continue the classwork.
Janet Linington (Designed January 2005, revised 2008)
|
|
|
